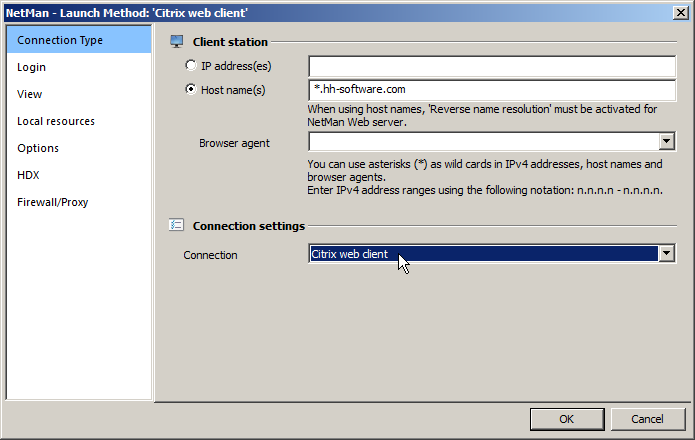
With the Citrix web client launch method, NetMan Web Services send a configuration file for the ICA client, which then connects to a XenApp server.
You can configure the following settings for an ICA session:
•Login settings
•Display options
•Connection of local resources
•Optional connection settings
•HDX settings
•Firewall and proxy settings
To configure the settings, begin by selecting the Citrix web client launch method. This opens all of the settings options available for the Citrix web client:

![]() This manual does not go into detail concerning ICA-specific configuration options. The dialogs are for the most part adapted to those in the Citrix Program Neighborhood. Refer to the Citrix documentation for a description of the options.
This manual does not go into detail concerning ICA-specific configuration options. The dialogs are for the most part adapted to those in the Citrix Program Neighborhood. Refer to the Citrix documentation for a description of the options.
For a description of the individual settings dialog pages, see "Editing session settings".
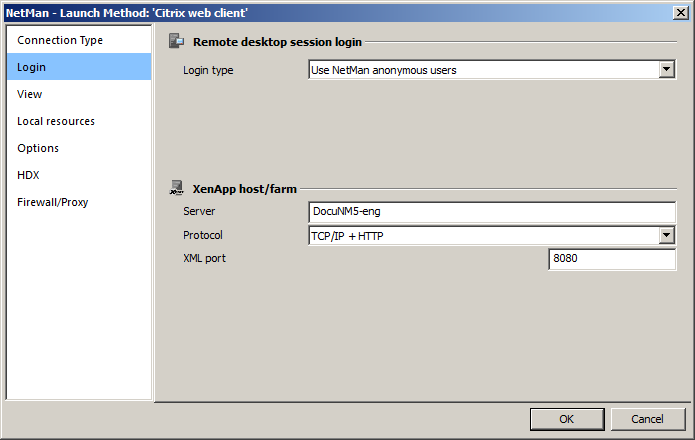
Login:
On this page, you can configure the login the server over the Web Interface using Citrix web client:

The Web Interface supports the following protocols:
TCP/IP + HTTP: The application is determined over HTTP. This is the standard method for today's installations.
TCP/IP + HTTPS: With this setting, both the application determination and data traffic in the ICA session run in an SSL tunnel (with Citrix Secure Gateway in relay mode).
Firewall/Proxy:
In addition to the native connection between server and client on TCP/IP port 1493, the Web Interface supports other operating modes for the connection between the Citrix web client and the XenApp server:
•Proxy with HTTPS
•SOCKS proxy
![]() With different published applications and connection settings for launch rules, you can connect various Citrix farms with an instance of the Web Interface. For example, the employees in a university library can use a different server farm than that used by the students, who access HTML across the campus through a server farm in the DMZ.
With different published applications and connection settings for launch rules, you can connect various Citrix farms with an instance of the Web Interface. For example, the employees in a university library can use a different server farm than that used by the students, who access HTML across the campus through a server farm in the DMZ.
![]() Citrix sessions are always called using the published applications mechanism. With this technique, NetMan supports load balancing over ICA. With the default settings, NetMan uses one Citrix published application (see "XenApp Support"). Prerequisite is that all applications are installed on all servers for correct functioning of load balancing under Citrix. If this is not possible, you can enter the published application in your Script-specific session settings. For details, see "Editing session settings".
Citrix sessions are always called using the published applications mechanism. With this technique, NetMan supports load balancing over ICA. With the default settings, NetMan uses one Citrix published application (see "XenApp Support"). Prerequisite is that all applications are installed on all servers for correct functioning of load balancing under Citrix. If this is not possible, you can enter the published application in your Script-specific session settings. For details, see "Editing session settings".
![]() There are a number of properties for an ICA connection which are rarely used and which cannot be configured in the dialogs shown above. You can configure these settings directly in the template file for the ICA session launch, Standard.ica, in the <%NMHome%\System\web\templates\Launch\ directory. In general, however, you will not need to modify the template file.
There are a number of properties for an ICA connection which are rarely used and which cannot be configured in the dialogs shown above. You can configure these settings directly in the template file for the ICA session launch, Standard.ica, in the <%NMHome%\System\web\templates\Launch\ directory. In general, however, you will not need to modify the template file.
Standard.ica
[ApplicationServers]
@NM_PROMPT=
[WFClient]
Version=2
TcpBrowserAddress=@NM_TCPBROWSER
HTTPBrowserAddress=@NM_HTTPBROWSERUseAlternateAddress=@NM_ALTERNATE_ADDRESS
CPMAllowed=@NM_REDIRECT_ICA_PRINTERS
CDMAllowed=@NM_REDIRECT_ICA_DRIVES
COMAllowed=@NM_REDIRECT_ICA_COMPORTS
[@NM_PROMPT]
TcpBrowserAddress=@NM_TCPBROWSER
HTTPBrowserAddress=@NM_HTTPBROWSER
@NM_ICA_DISPLAY
TransportDriver=TCP/IP
WinStationDriver=ICA 3.0
BrowserProtocol=@NM_BROWSER_PROTOCOL
SSLEnable=@NM_ICA_SSL_ENABLE
SSLProxyHost=@NM_SSL_PROXY_HOST
Compress=@NM_COMPRESS
Username=@NM_USER
Password=@NM_PASSWD
Domain=@NM_DOMAIN
UseLocalUserAndPassword=@NM_ICA_USE_LOCALUSERDATA
InitialProgram=#"@NM_PUBAPP" @NM_CMDPARAM
Address=@NM_PUBAPP
WorkDirectory=
@NM_SECTION_ENCRYPTION
@NM_SECTION_COMPRESS
Before the ICA file is sent, the NetMan Web Service replaces the @NM_... placeholders with specific values.
![]() For more information on what entries are possible in these INI files, refer to the Citrix documentation.
For more information on what entries are possible in these INI files, refer to the Citrix documentation.